Once in this menu, we must click on the button at the bottom right, the entire list of official integrations of the home automation system will be displayed, and we enter “ipp” in the search engine, the first result is the one we must choose : Internet[1] Printing Protocol (IPP).
To carry out this configuration, we simply have to fill in some information:
- Host: is the IP address of the printer. It is necessary that your printer always obtains the same private IP address, this can be done on the printer itself by entering a fixed IP, or directly on the router that we have in the “Static DHCP” section where we will put both its MAC address and IP private that we want it to have.
- Port: The default port is 631 and we should not modify it, unless your printer uses a different one. If you use a different one you will have to look at the documentation.
- Relative path to printer: We also leave it with the default value, if it is not that it will give us an error and we will have to look for it in the printer documentation.
We leave the “Use an SSL certificate” and “Verify the SSL certificate” options unchecked, since printers[2] normally do not use SSL certificates for the encrypted connection. Once we have put everything in, click on the “SEND” button.

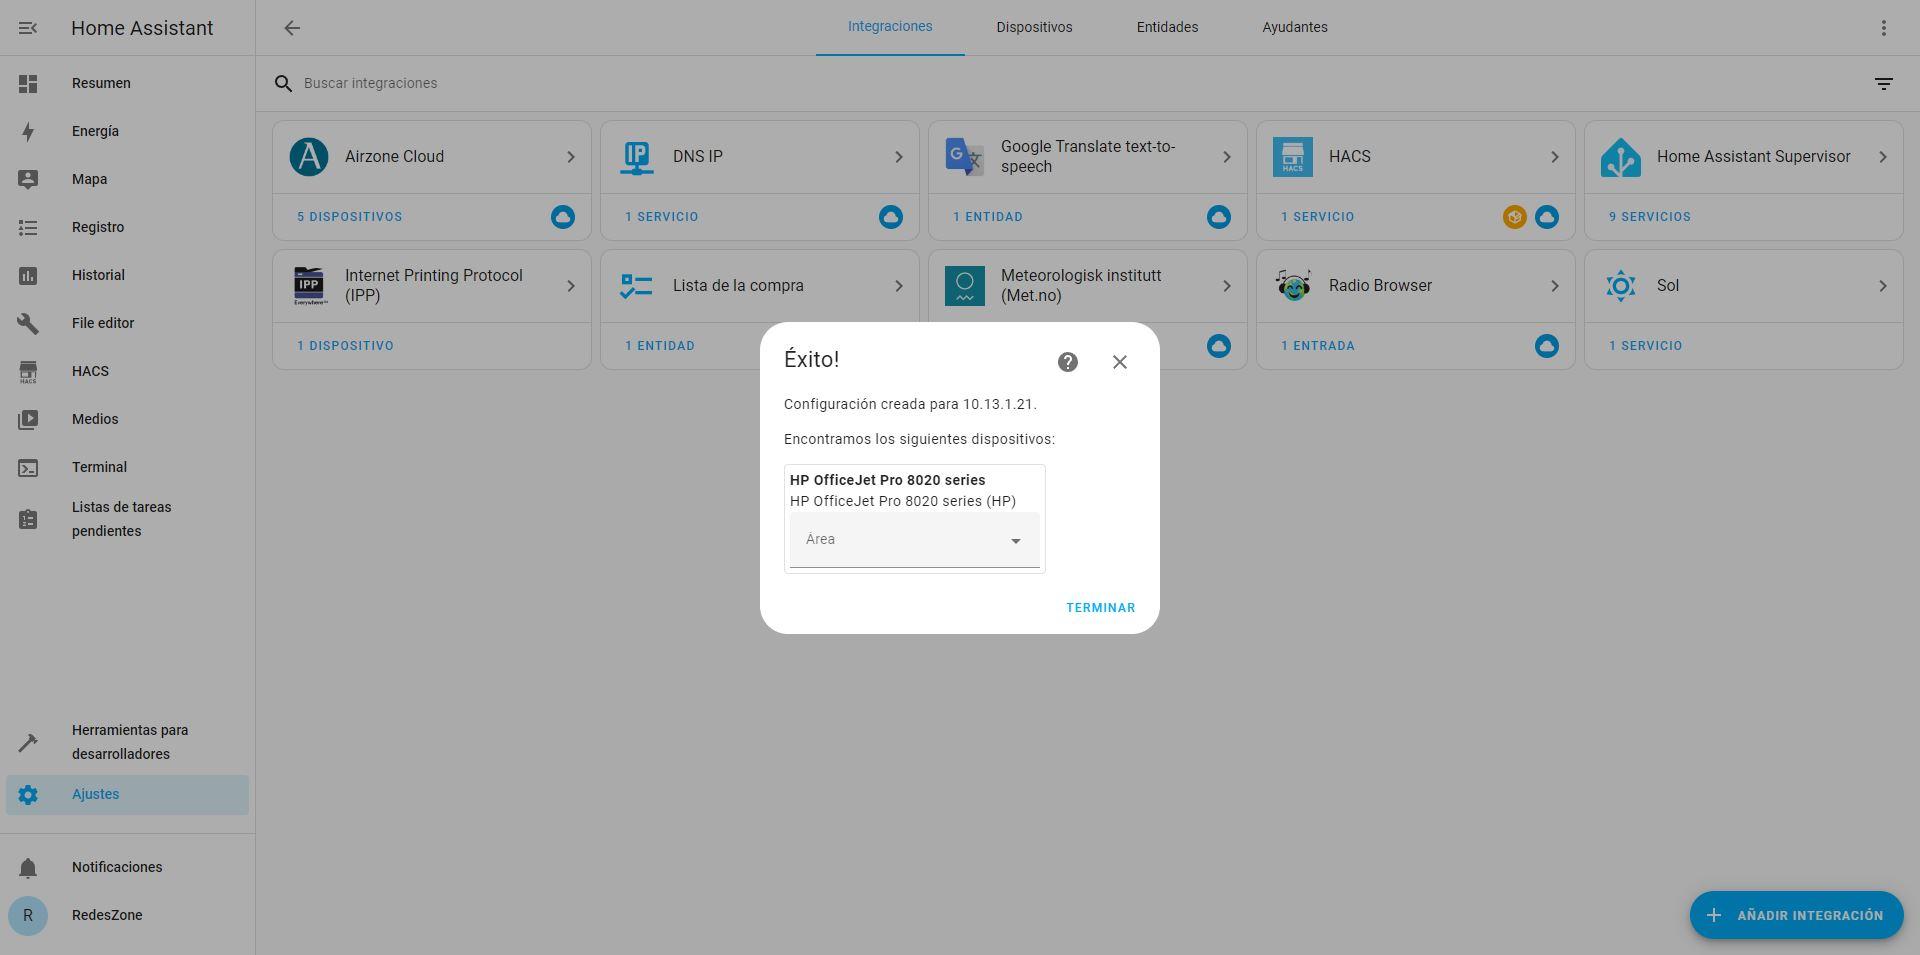
It will tell us that it has been successful, and that a configuration has been created for the IP address that we indicated previously. Here you should already recognize the brand and model of the printer in question, as it appears to us.
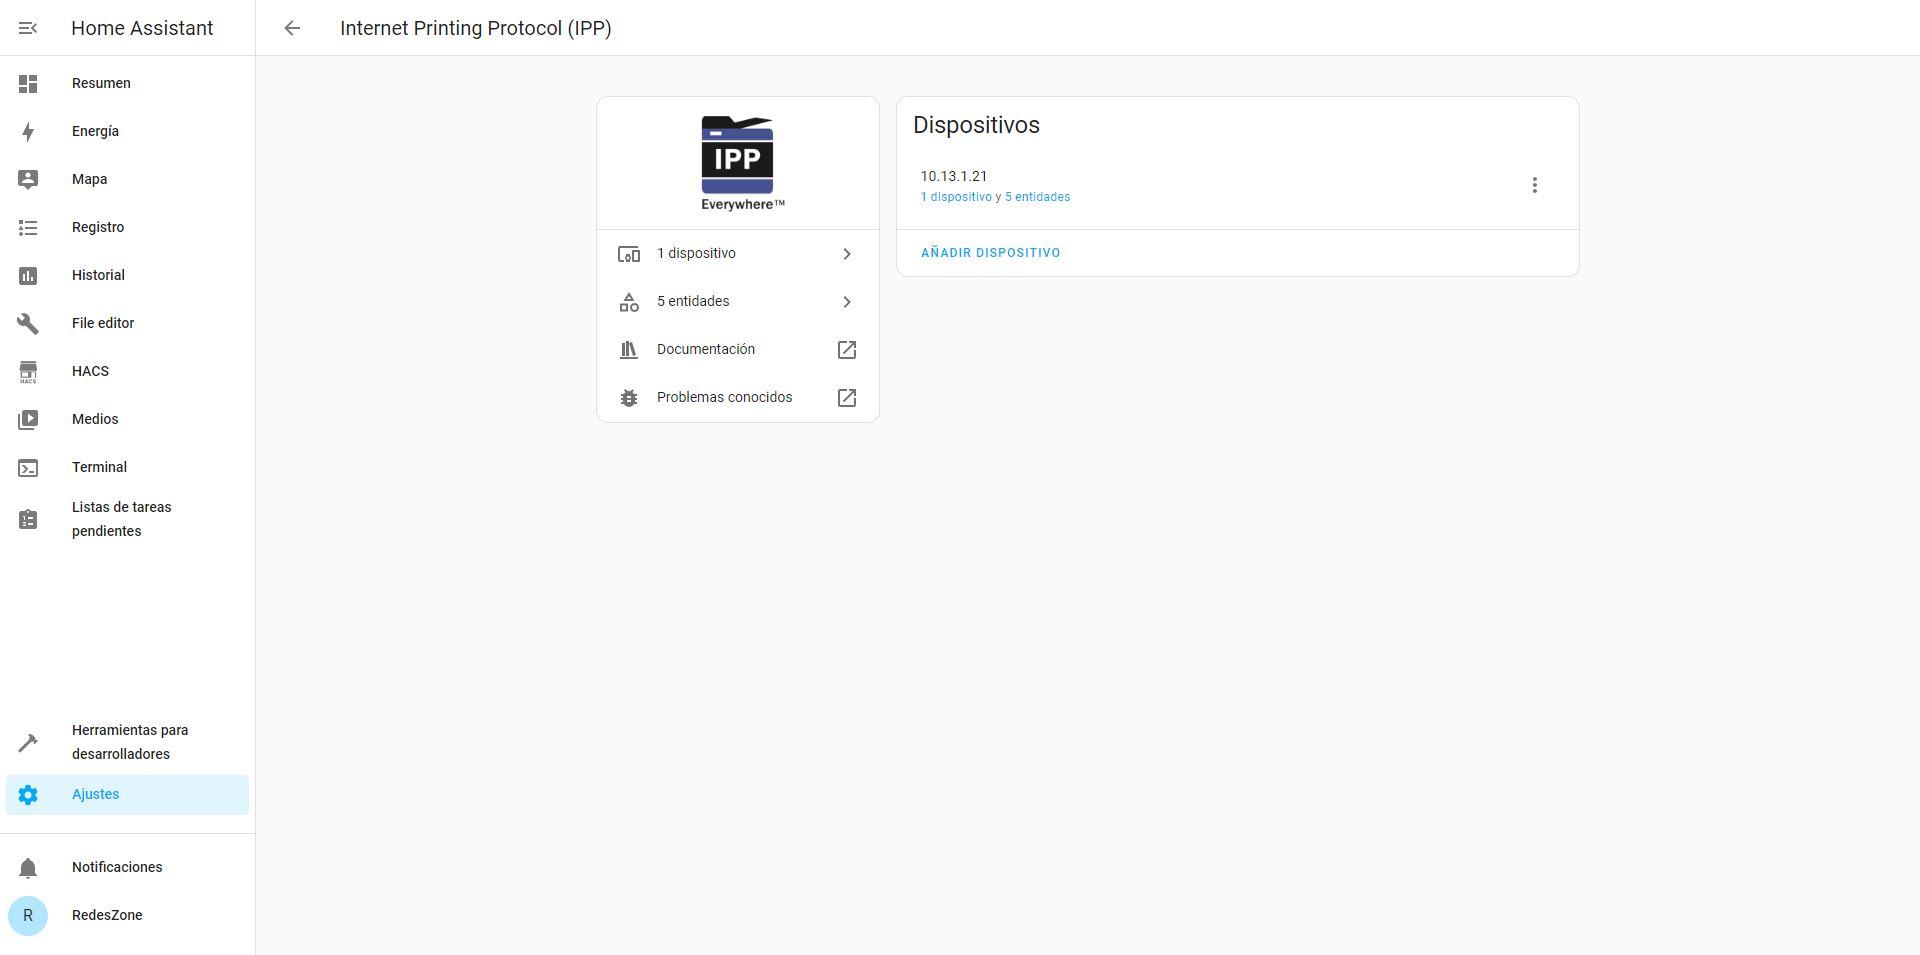
If we get into the very integration of «Internet Printing Protocol (IPP)» we can see the device that we just added, which has 5 entities in total. If we want to add more printers we can follow the same process as before, or directly click on «Add device«.
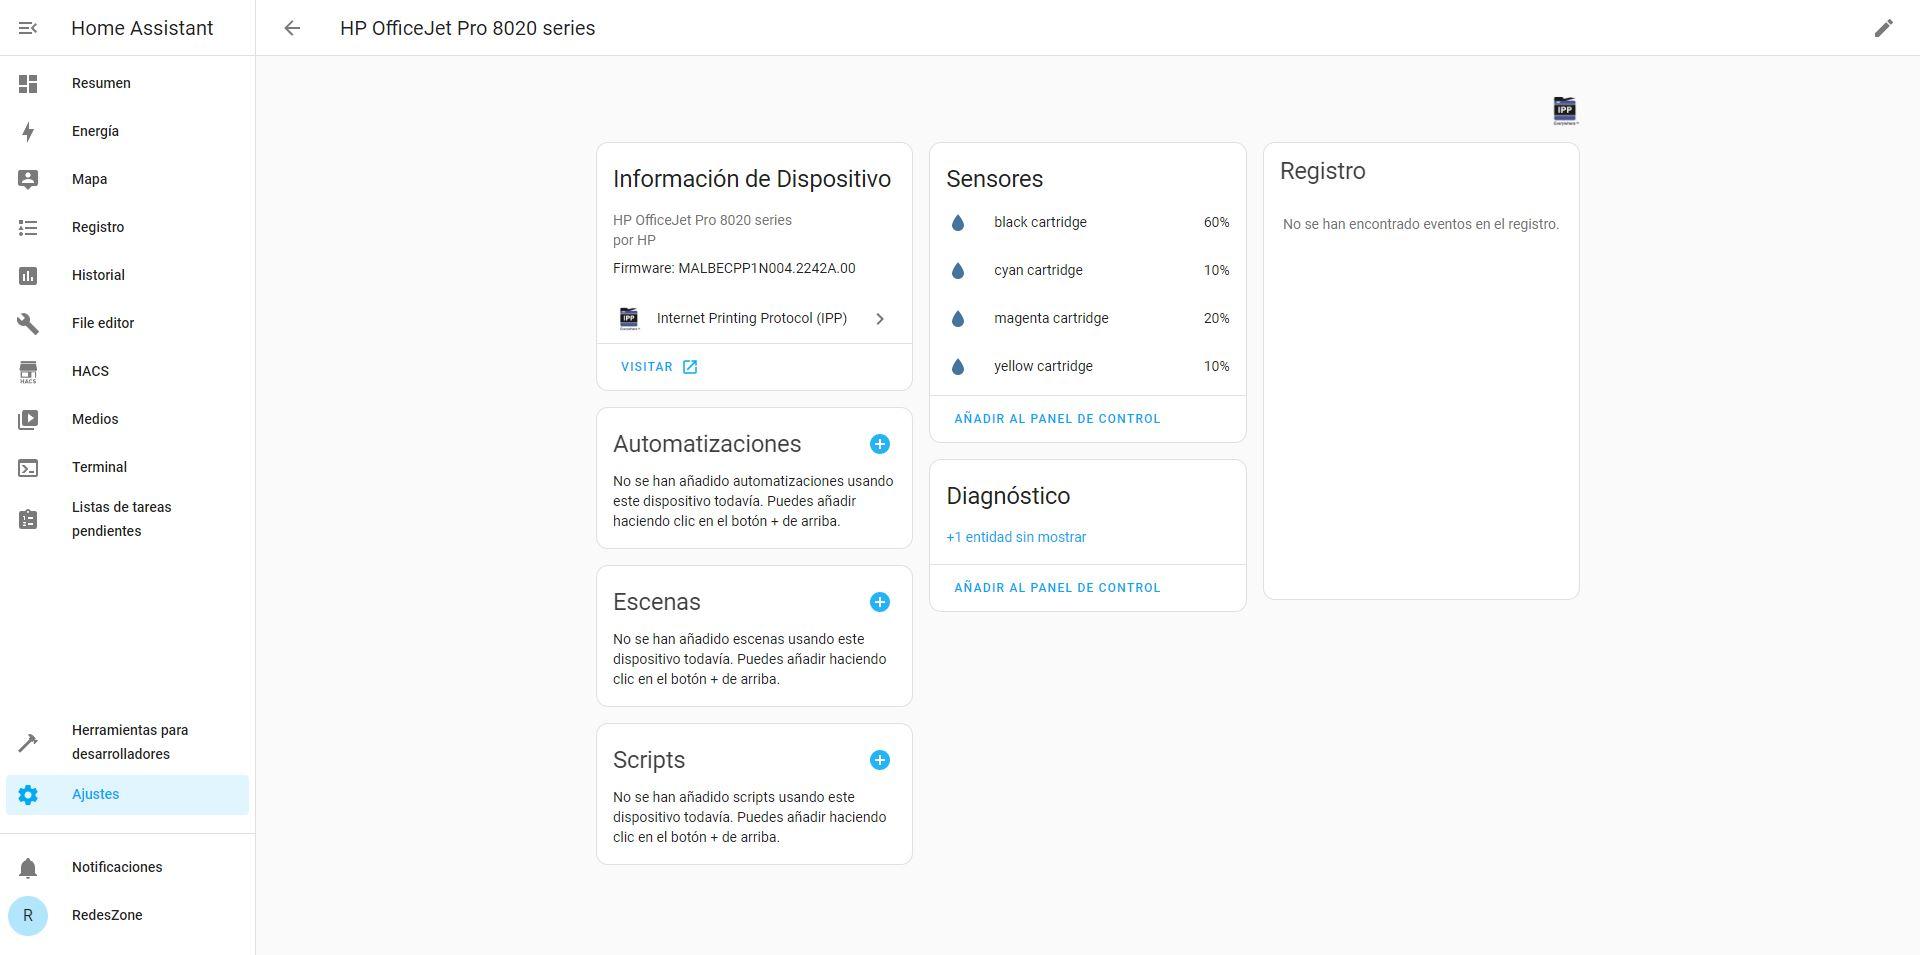
If we go into the printer device, we can see the make and model, the firmware version, as well as the sensors we have available. Basically we will have one sensor for each color of the printer: black, cyan, magenta and yellow. We will also have an additional diagnostic sensor that we can enable, but manually.
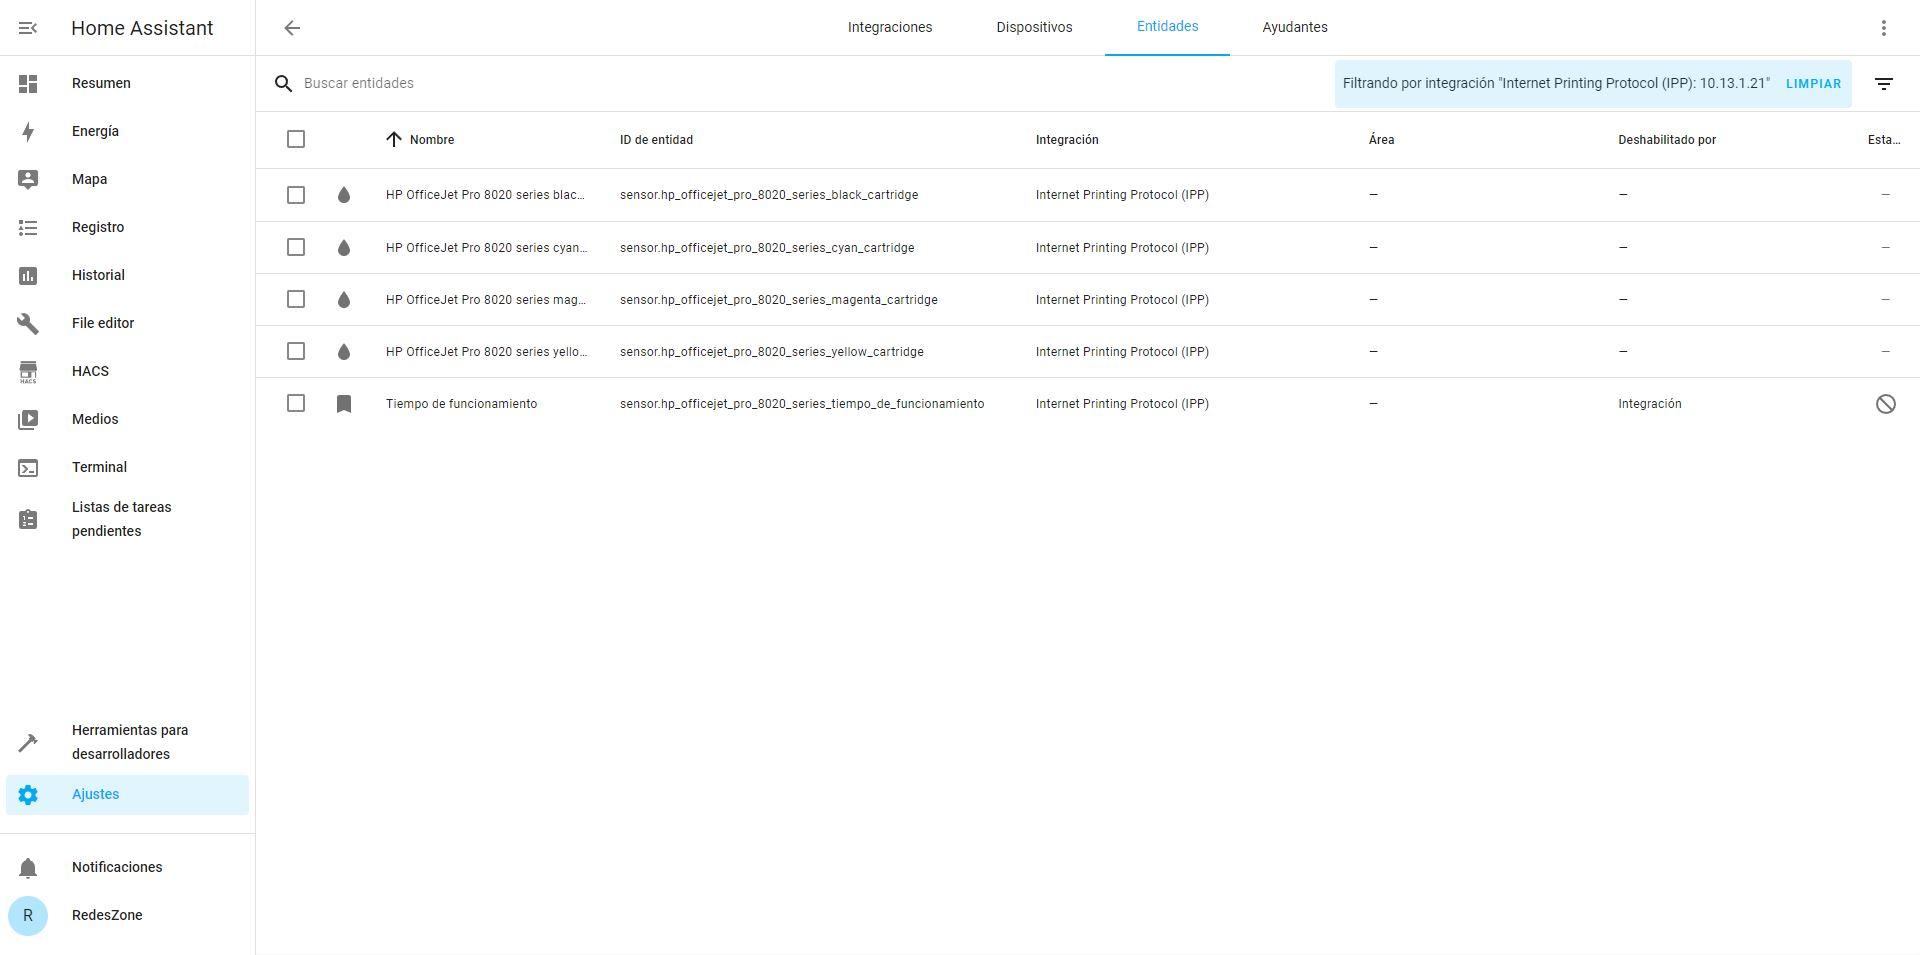
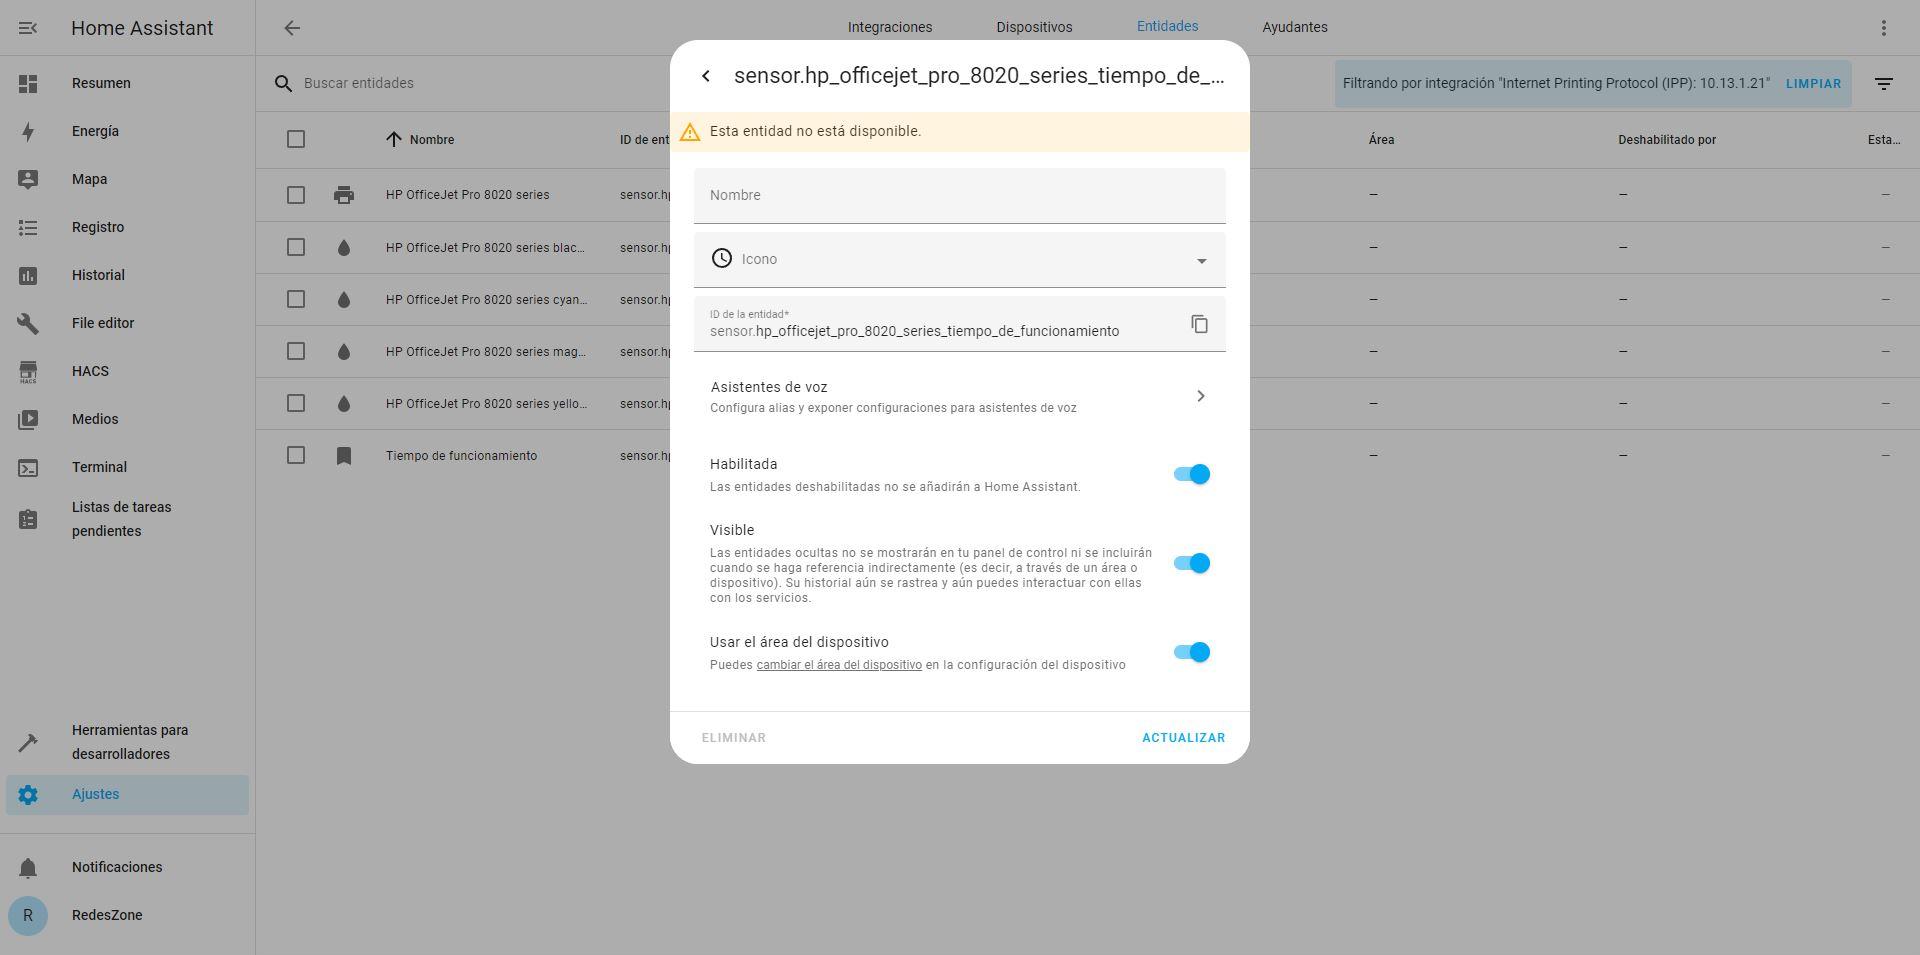
If we go to the “Entities” section, we can see all the entities that we have, including the one that is disabled, which is the operating time of the printer, as you can see:
If we want to enable this entity, just click on it, and activate the “Enabled” option, click on “Update” and wait a minute for it to be available.
Once we have the integration ready for our printer, we now have to configure an automation to continually check the printer’s ink level and notify us via Telegram if it falls below a certain threshold.
Set up automation and have it notify you via Telegram
To configure an automation, we must go to the «Settings / Automations and scenes«, which is where we will have all the automations configured.

We will be able to see all the automations, although we also have access to the scenes, scripts and plans. In this menu, we click on the button at the bottom right where it says «Create automation«.

In the drop-down menu that appears, click on «Create new automation«.

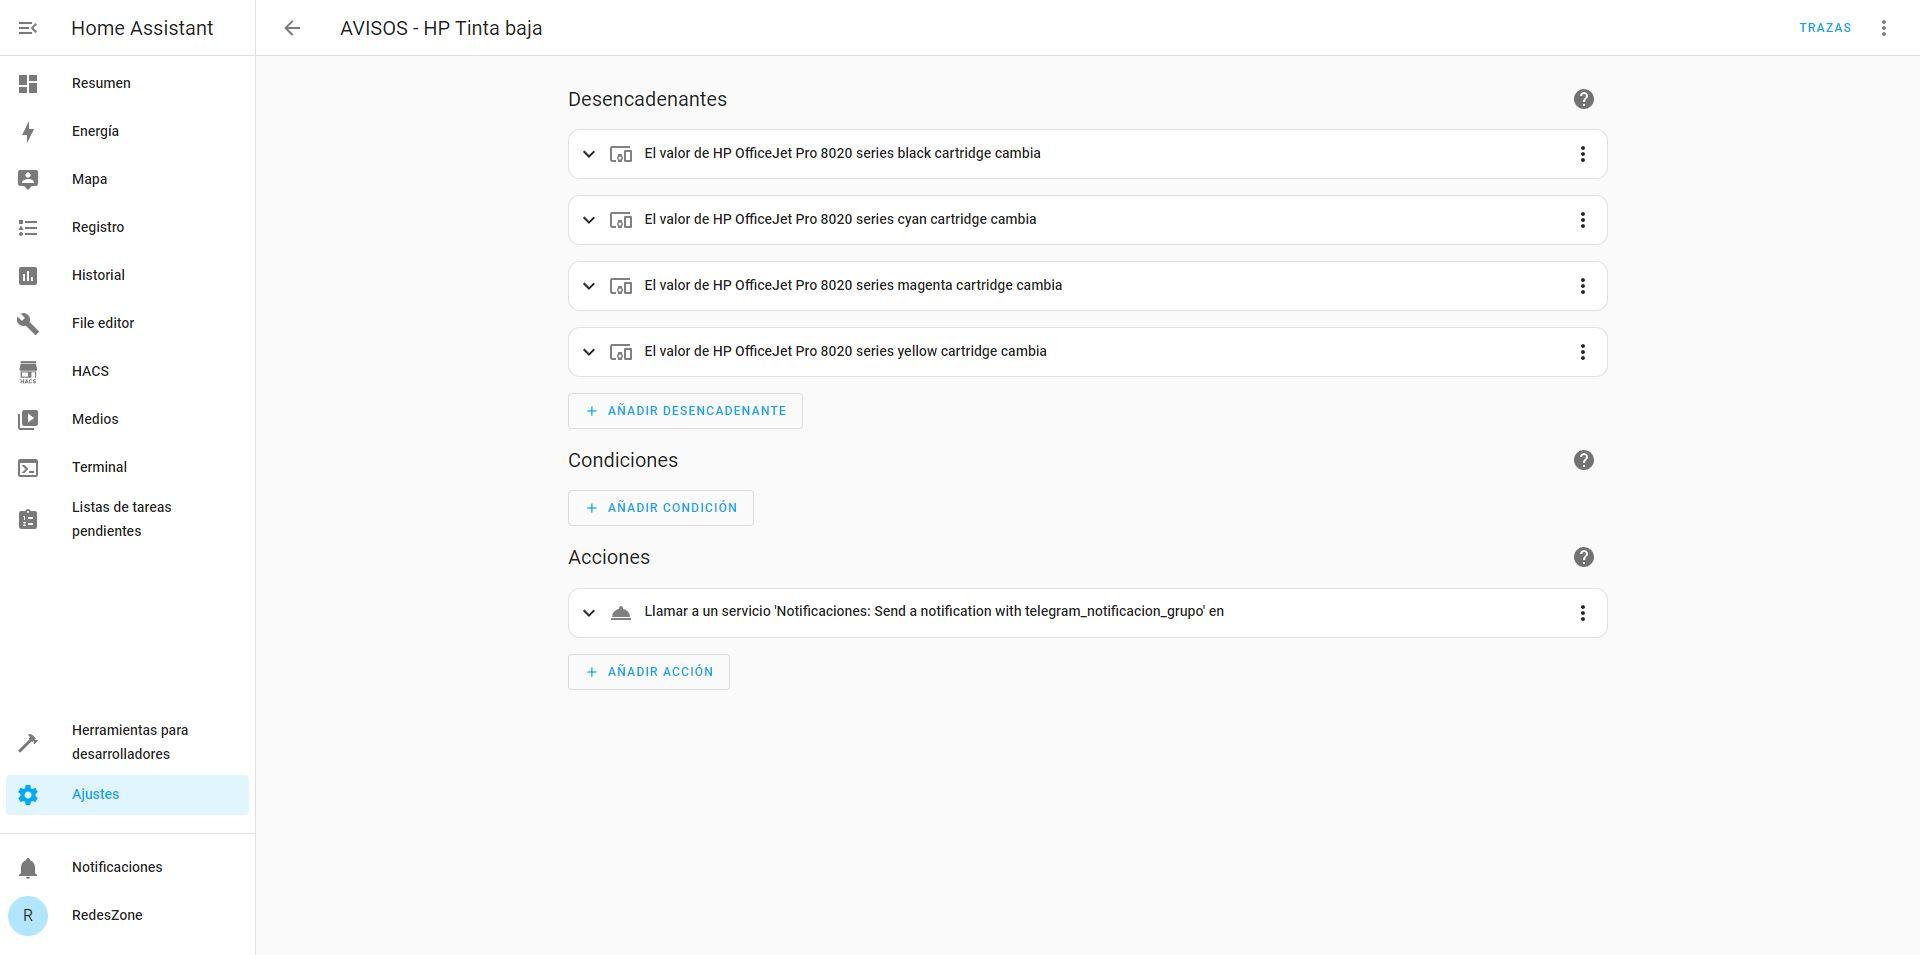
The automation that we are going to create consists of checking all the printer ink levels one by one, and if any of them drop below 35% then it will notify us via Telegram telling us to check the printer ink levels. The first thing we must indicate before creating an automation is that we have several ways to create them depending on the type of device and what we want to do, for example, to be able to do what we have proposed, in “Trigger” we can choose “Device », «Status» or «Numeric Status».
In this example, we have chosen in «Trigger» the option of «Device«:

We will choose the device «HP OfficeJet Pro 8020 Series» which is our printer, depending on what brand and model yours is, it will appear in one way or another in the drop-down menu that allows us to choose all the devices. Once we have chosen it, in the «Trigger» we can see the different options, in this case, we have chosen «The value of HP OfficeJet Pro 8020 series black cartridge changes» and we have put «Below 35«.

We can configure one trigger for each printer color, that is, a total of four triggers. The configuration would be exactly the same, we only have to change the trigger in question.

Once we have configured the four triggers, we go to the “Actions” section to proceed to send us the notice via Telegram. If you have not configured Telegram notifications in Home Assistant, it is necessary to do so before continuing. In RedesZone you have a complete tutorial on how to create the corresponding bot, how to create the group and add the bot to said group.
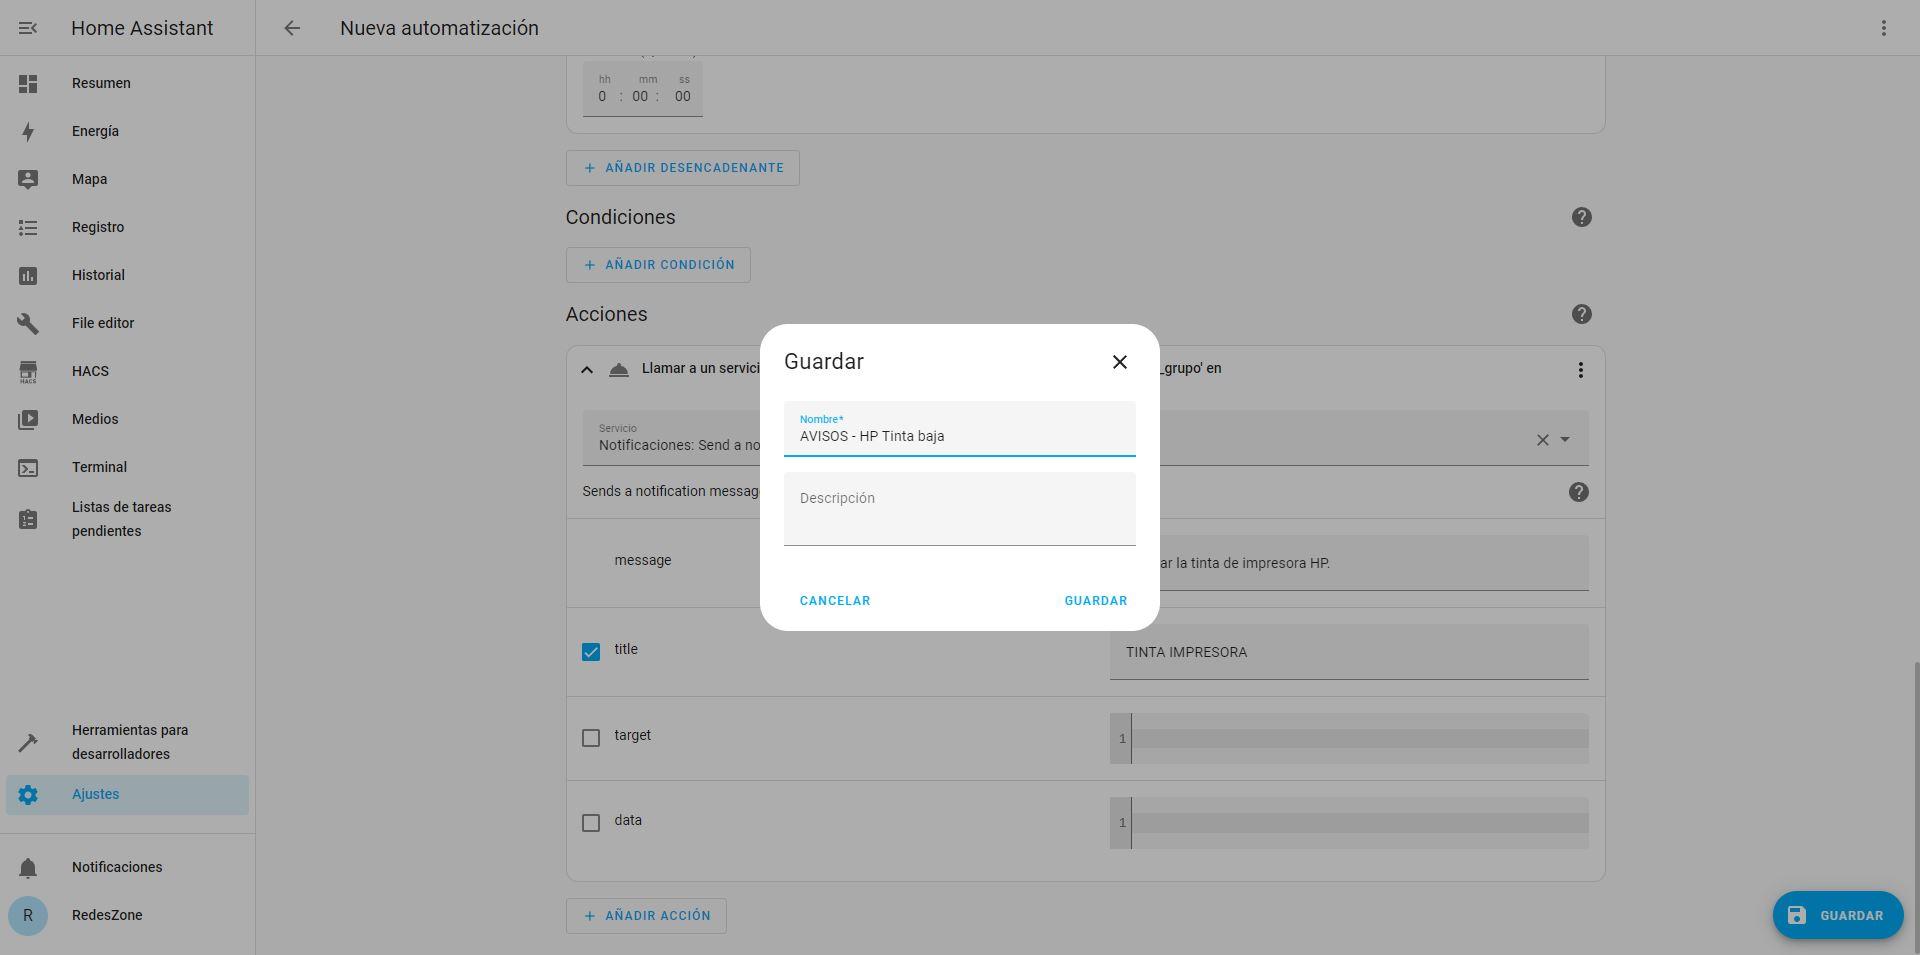
In this section we will choose «Notifications«, and we will choose if we want notification in the group or individually, and later we put the title and also the message in question.

Now we just need to save this «Automation» with a name and a brief description, and click on the «Keep«.
The summary of the entire configuration would be the following:
If your ink is low, the automation will send you a Telegram message from time to time reminding you, and it can be quite annoying. You have the option of turning off this automation for a while, and then turning it back on so it doesn’t bother you as much. In “Call Service” you can choose “Service > Automation: Turn Off”, choose the “Choose Entity” option and select the automation you just created (the automation itself), it is very important that you do not select the “Call Service” option. Stop actions”, because if not, it will not be possible to activate it again automatically.
Then you add a delay of 48 hours or as many as you want, and finally you call “Automation: Turn on” again with the same entity.

The summary of the entire configuration would be the following:

In this way, the automation will notify us if any ink cartridge is below the 35% threshold. By notifying us, the automation will be deactivated, it will wait 48 hours and activate it again. This way, you will not receive several messages on Telegram on the same day.